Most microphone guides are written for musicians, podcasters, or content creators. Recording a sound bath is none of those things. The rules are different. The priorities are different. And the wrong choice doesn’t just cost you money – it costs you the quality of the healing you deliver.
This is the guide I wish existed when I started recording sessions.
Why recording a sound bath is technically different
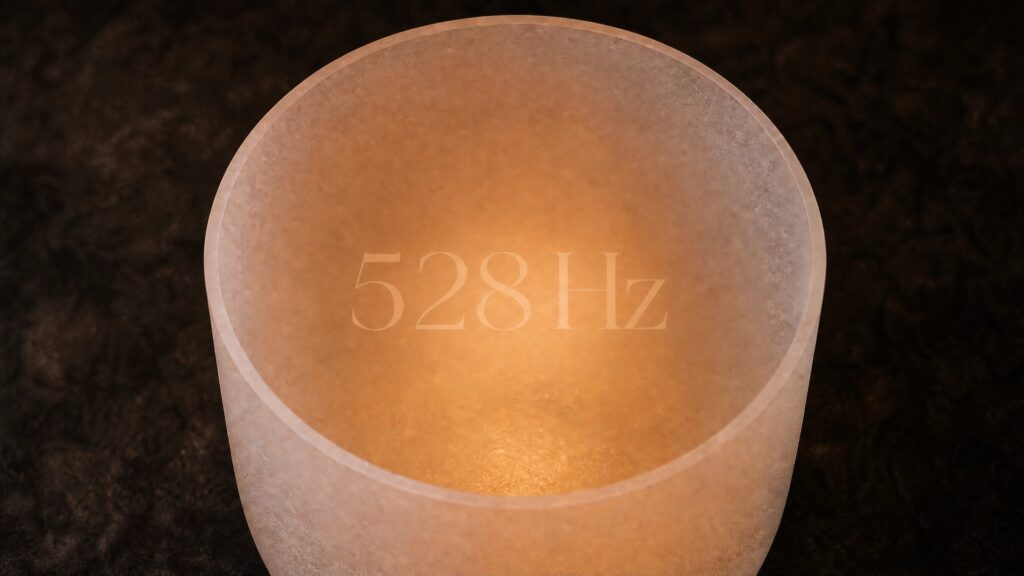
Recording a singing bowl is completely different from recording a voice or a guitar. The main reason: sound healing sessions are quiet. Really quiet.
Every microphone has what’s called a noise floor – a low level of background noise that exists in the recording even when nothing is happening. With cheap microphones, that noise floor is audible. You don’t just hear the singing bowls. You hear a constant soft hiss underneath everything. In any recording, that’s distracting. In a healing session, it’s a real problem – because the nervous system of your listener cannot fully relax when something is constantly disturbing the quiet.
There’s more. Singing bowls, gongs, and other healing instruments have an incredibly rich frequency spectrum – from very deep fundamental tones all the way up to delicate overtones and harmonics. A cheap microphone cuts parts of this. It can’t pick up the low end. It doesn’t reproduce the subtle high frequencies. What you get is a compressed, flat version of something that was meant to be alive and three-dimensional.
Then there’s dynamics – the difference between quiet and loud, between a gentle touch on a bowl and a full strike. Low quality microphones don’t capture this range well. Everything ends up at a similar level. The natural breathing of the sound disappears.
What does this mean for the listener? They can’t fall in. Their mind stays busy – noticing something is off, slightly irritated without knowing why. When someone comes to your in-person session, they trust the sound will carry them. They let go. When they receive a recording, the sound needs to do that work. If it doesn’t, the session doesn’t land the way it’s meant to.
Three things to understand before you buy anything
1. Know your use case. Are you recording indoors in a quiet space, or outdoors at a retreat? Are you recording pre-made sessions for headphone listening, or hosting live Zoom sessions? Each setup is different. Don’t buy until you know which one you’re building for.
2. Understand the signal chain. The path is simple: your instruments → microphone → audio interface → computer → listener. Every link matters. Most people focus on the microphone. The audio interface – the box that converts your microphone signal into something the computer can read – matters just as much. A good microphone connected to a bad interface still sounds bad.

3. Stereo is not optional. When you listen to a sound bath in mono – one signal, center – it sounds flat. The sound comes from one point. But in reality, the sound of a singing bowl travels through space. You hear it with both ears. The reverb spreads across the room. Stereo recording captures this – two microphones, placed correctly, give you a left signal and a right signal. When someone puts on headphones, they feel like they’re inside the room. That experience of being inside the sound is what makes healing work on a recording. Mono removes it.

Condenser vs dynamic – which one for sound healing?
For recording healing instruments, condenser microphones are almost always the right choice.
They’re more sensitive, more detailed, and capture the full frequency range of instruments and overtones. They pick up the room, the space, the delicate harmonics that make a singing bowl feel alive.
Dynamic microphones are more contained and robust – great for voices on a live stage, useful when you want to avoid picking up room noise or feedback from loudspeakers. But in a home or studio context, for instruments, they don’t pick up enough detail. The sound ends up smaller than it should be.
For voice in a live Zoom session – dynamic microphones make more sense, because they reject background noise and help prevent your voice from feeding back through the speakers. For a pre-recorded session where everything is quiet and controlled, a condenser microphone for the voice is better.
Tier 1 – Minimal budget
Option A – Portable stereo recorder: The Zoom H4 Essential (~€150–200) or the Tascam Portacapture X6 (~€230–300).
These all-in-one recorders have built-in stereo microphones, a decent preamp, and connect directly to your computer via USB. No extra interface needed, no cables, no complex setup. You press record and you’re recording.
Option B – USB microphone with stereo mode: Not all USB microphones record in stereo – most are mono only. But some have a stereo mode, and those can work here. The Blue Yeti (~€130–150) is the most well-known – it has four polar patterns, stereo included. The HyperX QuadCast S (~€130–160) also has stereo mode. Plug in via USB, open your recording software, done. No interface needed.
The important caveat: these USB microphones put both capsules in the same housing. The stereo image is narrower than what you get with two properly spaced microphones. You get stereo – which is already much better than mono – but you won’t fully capture the width and depth of a large room.

What you get: Stereo recording with minimal setup. Better than a phone or a standard mono USB mic. Usable sessions, especially if your setup is small – one or two instruments in a quiet room.
What you give up: The noise floor is higher than with studio microphones – audible in very quiet passages. The stereo image is narrower. If your instruments are spread across a large room, things more than a meter or two from the recorder will sound distant and quiet. The frequency response is more limited than a proper condenser pair.
If your practice is small and you’re just starting to share sessions, this works. It’s a real first step. But you’ll hear the ceiling quickly – and when you do, you’ll know it’s time to move up.
Tier 2 – A proper starting point (~€350–500)
This is where the sound changes fundamentally.
Recommended setup:
- Rode M5 Matched Pair (~€120–180) – small condenser microphones, matched so both sound identical, designed specifically for stereo recording of acoustic instruments
- Focusrite Scarlett 2i2 (~€140–180) – the most reliable entry audio interface; plug in two microphones, record them into your computer with very low noise
- XLR cables (one per microphone) and microphone stands – required, not optional
- Headphones – useful for testing and listening back while you set up, to catch positioning problems before you record a full session

What you get: A real stereo setup. The noise floor drops significantly. The frequency spectrum opens up – you hear the full depth of the instruments. Microphones can be spaced properly across your room so you actually capture the space. This is a setup you can grow with.
What you’re still limited on: Two inputs means instruments or voice – not both at the same time. Instruments recorded in stereo already use both channels. If you also want to record your voice separately on its own channel, you need a third input – which this setup doesn’t have. If you try to record voice and instruments together through the same two stereo microphones, you get the head movement problem described below. For pure instrument sessions and pre-recorded healing journeys, this setup is completely sufficient.
Tier 3 – The full setup (~€600–1000)
Recommended setup:
- SE Electronics SE7 Stereo Set (~€180–250) or Rode M5 Matched Pair (~€120–180) for instruments in stereo – other quality matched condenser pairs also work
- Focusrite Scarlett 2i2 4th Gen (~€140–180) – or a larger interface (4+ inputs) if you want to add more microphones
- Shure SM58 (~€90–110) for voice in live sessions, or Rode NT1-A (~€170–220) for studio voice recording
- XLR cables (one per microphone) and microphone stands
- Closed-back headphones – recommended for monitoring your own voice while recording; you hear exactly what the microphone is capturing in real time

What you get: Everything. Instruments in proper stereo, voice recorded separately and placed in the center of the mix. You can spread microphones across a large room and pick up each instrument from its best angle. No noise floor. Full dynamics. Full frequency range from the deepest gong tone to the highest overtone.
If you want to add even more microphones – for example, a dedicated microphone for the gong in addition to the stereo pair – you will need a larger audio interface with more inputs. A 4-input or 6-input interface handles this without any compromise to the rest of the setup.
When someone puts on headphones and presses play, they feel like they walked into the room. That is the goal.
Does the same microphone work for all instruments and voice?
For instruments – singing bowls, chimes, voice bells – the same stereo microphones usually work well together. Gongs are a different case. They produce significantly more volume than singing bowls and go much lower in frequency. The same stereo pair will pick them up, but you lose control over the balance. In a mixed session where bowls and gongs are both present, the gong can easily overwhelm everything else in the recording, and you can’t fix that in the mix if they’re all captured on the same two channels.
A dedicated microphone for the gong – recorded on a separate channel – gives you full control. You can set its volume independently and place it exactly where it needs to be in the final recording. This is one of the main reasons to move to a larger audio interface with more inputs.
For voice – light language, spoken guidance, singing – a separate microphone always gives better results. The reason is placement. When your instrument microphones are set up for stereo capture of the room, your voice gets picked up from a distance. Even small head movements – the natural movement of speaking or chanting – shift the voice left and right in the stereo field. With headphones, that becomes distracting over time.
A third microphone placed close to your mouth, recorded on a separate channel, solves this. You can then place the voice signal in the center of the mix, where it stays stable and direct, while the instruments breathe around it in stereo.
If the voice microphone is close to your mouth, you also need a pop filter – a mesh screen that sits in front of the capsule and prevents hard consonants like “p” and “b” from hitting the microphone directly and creating a loud low-frequency thump. Some microphones include this, like the Rode NT1-A which comes with integrated pop protection built into the design. Others need a separate pop filter, which costs around €10–20 and clips onto the stand.

If budget forces you to use one stereo pair for everything – voice and instruments together – it works. Just be aware of your head position and try to stay still when speaking.
The most common mistake
Sound healers often choose digital wireless solutions – DJI microphones, lavalier clip-ons, or USB microphones – because they look simple and affordable. Some of them cost as much as a proper studio setup.
The problem is how they process the sound. These microphones compress the signal, limit the frequency response, and apply internal processing that removes exactly the subtle qualities that make healing work. The dynamics flatten. The overtones disappear. What’s left sounds small and distant.
There’s also a practical issue with some wireless microphones – they use Bluetooth, which can introduce latency. If you’re recording audio alongside video, even a small delay between what you see and what you hear is noticeable and distracting. This is less of a problem with newer Bluetooth standards, but it’s worth being aware of. With a wired audio interface, the signal is stable and latency is not an issue.
Studio condenser microphones connected to a proper audio interface capture a raw, unprocessed signal. No compression, no automatic filtering, no “enhancement.” That unfiltered signal is what carries the full frequency of the instruments – and that frequency is what the listener receives.
You can spend the same amount of money and get completely different results depending on what you buy. The right microphone, positioned well, will sound better than an expensive wireless solution placed poorly.
How to know your setup is actually working
Make a test recording before your first real session.
Play your instruments. Record two or three minutes. Then listen back – on headphones, with your eyes closed, treating it like a real session.

What to listen for:
- Does it sound natural? Like you’re actually in the room?
- Are there dynamics – quiet and loud, breath and strike?
- Is there a constant hiss or noise underneath the sound?
- Does the stereo image feel wide? Does the sound feel like it comes from different directions?
When it sounds like real, you’re done. When it sounds flat, distant, or compressed – adjust the placement before you change the gear. Microphone position makes an enormous difference. Closer to the instruments brings more direct sound. Further away brings more room and space. There’s no formula – trust what you hear.
One practical thing: if you’re using condenser microphones, make sure phantom power (48V) is activated on your audio interface. Without it, condenser microphones don’t work at all. It’s a button on the front of most interfaces. Easy to forget, easy to check.
When you forget about the setup while listening – that’s when you know it’s right.
The best microphone setup is the one that actually leaves your hands and gets used. Start where you are. One recorded session shared with your community does more for your practice than waiting for the perfect gear.
Want help setting up your specific situation?
Every sound healer’s setup is different – different instruments, different rooms, different goals. If you want someone to look at exactly what you have and what you’re trying to create, I work 1:1 with sound healers on this. From choosing the right gear for your budget to getting the best possible sound out of your first recording.
Get in touch and tell me where you are and what you’re looking to build.