
Short answer: most flat-sounding sound bath recordings come down to one of three things: the wrong microphone setup (don’t use mono, use stereo), a room that’s adding noise instead of staying quiet, or playback through weak laptop speakers. Fix the room and the mic, record in stereo, and add your voice to hold the container – and a recording can feel just as real as being there in person.
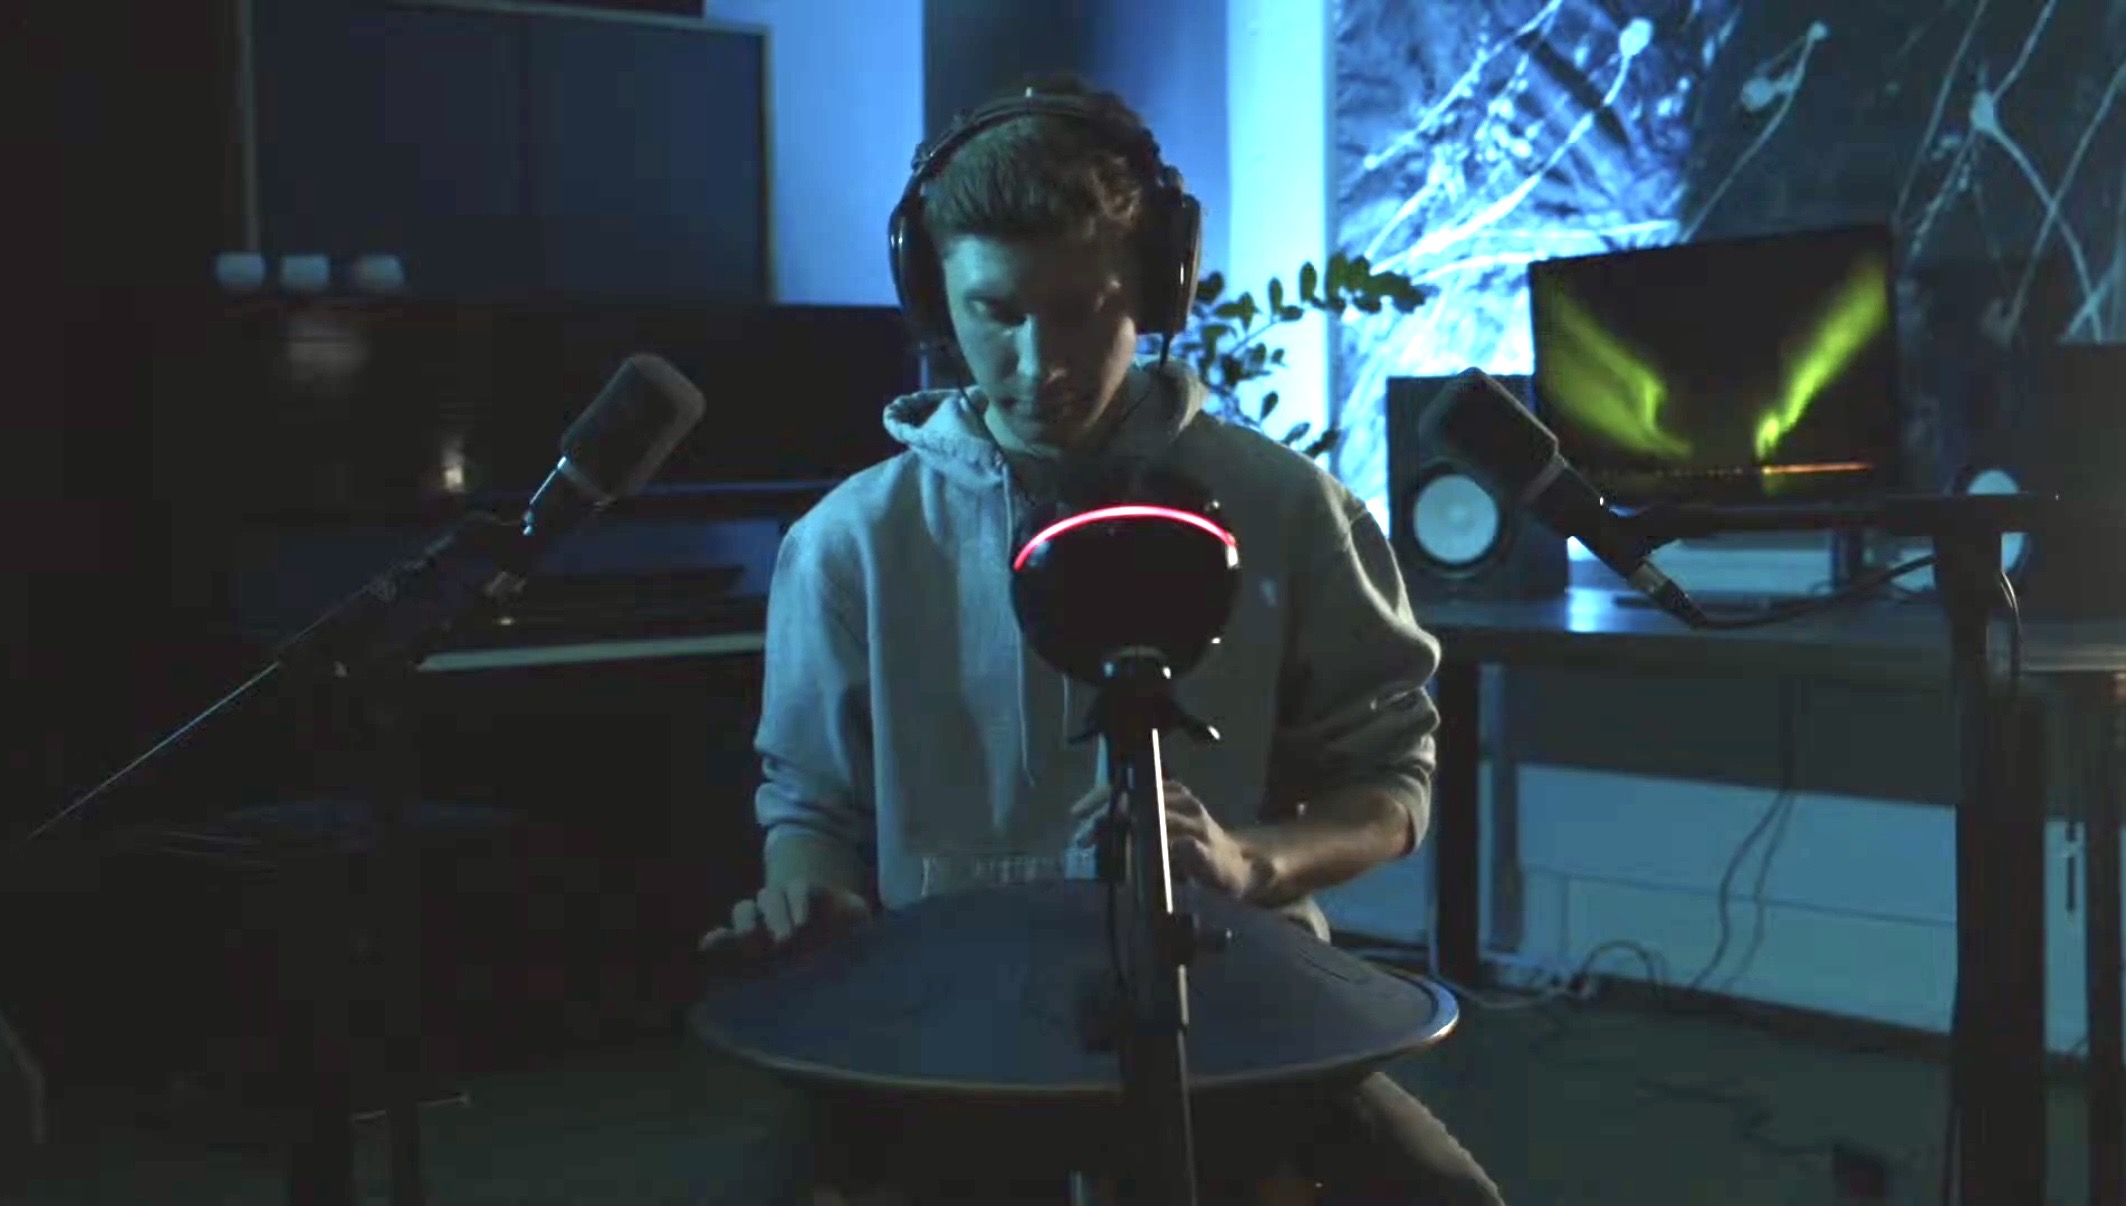
The image above was taken in March 2024. Me sitting in my basement in Germany. I had my handpan in front of me, a few microphones around me. My family was one floor higher laying in bed with their headphones on. Other family members were joining too, but from a different house. Some of my friends joined as well. They were all spread in different locations across Europe. We were all receiving the same signal: my handpan.
Everything it took to share my healing energy with the world were a few little microphones and a Zoom meeting.
For me, this session was just a test run. I had just graduated from my sound healer training a few weeks before. I was curious to see what happens if I host a sound bath not in person, but online with my recording setup. So I invited family and friends to come join me and see what happens.
Only later, when they gave me feedback, I realised that for them this was a full immersive sound bath experience as if they were all laying next to me in the same room. They received all of the energy, they had goosebumps on their skin, felt safe in the comfort of their own bed and could easily let go. They didn’t get distracted by other people snoring in the room or didn’t have to worry about catching the next bus to go home after the session. They could just put on their headphones, join my Zoom meeting, close their eyes and fall asleep whenever their body wanted to. They already laid in their favourite place, their bed.
I knew I was onto something big: recording sound baths from the comfort of my home – ready to be streamed all around the world and received by people in their homes. I was not limited to room sizes, I didn’t have to carry my sound healing instruments to a venue, I wasn’t limited to time preferences – my group could join whenever and from wherever they wanted to – either live or by listening to a recorded audio file.
In this guide I will go through the most important lessons that I have learned in order to host online sound bath sessions that feel like real sessions.
‘Sound healing recordings always sound flat and lifeless.’
You’ve probably heard this, maybe even experienced this by yourself. You joined the Zoom meeting, but you couldn’t relax at all. You just heard the speakers cranking with the resonance of a singing bowl.
This is the most common reason why a virtual sound bath sounds flat: in most cases, it’s a setup problem. Very often, the facilitator uses the wrong microphone, positions the microphone incorrectly, uses the wrong Zoom settings or plays in a room that’s too reverberant and absolutely not built for a sound recording.
Sometimes it’s also the playback, meaning the people listening to the sound bath have not been instructed correctly on how to receive the session. When a sound bath is played through laptop speakers, you can use the best mic and it will always sound thin and lifeless. Laptop speakers can never reproduce the depth, the width and the lower frequencies that are necessary to make a sound healing feel immersive.
When you tell your group to listen with high-quality headphones (that doesn’t mean expensive – simple iPhone headphones do the job as well), then their experience will improve tremendously – considering your setup and recording is fine.
Does healing actually work through a recording?
Before we talk about microphones and settings, let’s address the deeper question: can the healing actually reach through a recording or does it require someone to be physically present in the room with you?
In most cases – yes. Let me answer this both from an experience and a more scientific standpoint:
Most sound healing work operates through energy, intention and the field that a practitioner creates when they play. That field is set at the moment of recording. The listener who presses play an hour later, or a week later, from the other side of the world – they are tapping into that same energetic field. With the concept of non-local consciousness, the energy and intention we set is not bound to the moment and physical location it was created. It is always there, always accessible, when someone is ready to receive it.
While I don’t claim to be a scientist or a medical professional, and I’m still learning and understanding how all of this works – in my own personal experience, this concept works immediately and with surprisingly high accuracy. I sit down, place the intention, start creating sounds, record my instrument, send it to someone else and they can feel and name the intention without me telling them what the intention was.
However, there’s one exception in which virtual sound baths don’t work: physical vibration. When you press a tuning fork on someone’s spine, or place a bowl on their body, the mechanical vibration moves through their tissue and bones. That effect doesn’t occur through headphones – it requires direct contact. In case your work uses this specific modality, recordings will always be a partial experience.
But for most of what happens in a sound bath – receiving frequencies, an intention, healing energy, holding space for emotions – a recording is not a lesser version. Of course, there are certain things to consider when starting to host virtual sound baths. You can’t directly see your group and notice how they receive your session so there are certain precautions that need to be taken. Other than that, virtual sound baths are simply a different delivery of your practice. In my experience, people often find recorded sessions even more intimate than live ones. They are in their comfort space, wearing the clothes that make them feel comfortable, they can make all sounds they want to make without disturbing any other participants and fall asleep whenever they need to.
The most important piece of gear you already own: your room
Before you think about any equipment – think about the room you want to work in. This is the first thing that goes wrong with sound bath recordings. People spend hours researching microphones and then record in an empty living room or a hallway with long walls and wonder why everything sounds flat.
The microphone captures the room as much as it captures the instrument. In person, your clients are aware of where they are. They hear the reflections of the walls, the ambient sound, the hum of the building, even if they don’t consciously notice it. It all feels natural because they are physically present in it. But with virtual sound baths, your listener is at a completely different place with very different acoustics. The stronger your room bleeds into the recording, the more foreign and strange it sounds to them.
In order to record your instruments as clean as possible, choose a room that adds as little as possible. Find a space that is quiet and acoustically soft enough so that most of what they hear is the instrument.
What that means practically:
Even though it sounds obvious, always close all the windows. This step is simple, but makes an enormous difference. The street outside, the neighbors, the distant airplane – these are all constant low-level sounds that you stop hearing the longer you live at a place. Also make sure you keep all the flies out of the room when recording (more than once I’ve received a recording from a client with an annoying fly in it…). Remember, the microphone hears everything. Sometimes even better than we do with our ears.
Next, choose the softest room in your home. Often, I recommend setting yourself up in a bedroom with a mattress and pillows. Also curtains already do a lot of the acoustic work and dampen the reflections. A bathroom, a stairwell, an empty kitchen or living room – they all usually have hard surfaces and large empty walls that create reflections that pile up behind your instruments and make everything feel cluttered and strange.
And then consider the time that you’re recording. This is by far the piece of practical advice that has made the biggest difference in my own recordings: record at night. When you record during daytime, there might be a lot of cars outside, children, delivery trucks, planes, lawnmowers, friends ringing on your door spontaneously. At night, the world quiets down. Think about what is the quietest time window at your location and use that. Your room matters, yes – but the silence around it matters even more.
There’s one test you can do before setting up any equipment: stand in your chosen room and clap your hands or snap your fingers once. If you hear a sharp ring or a long decay – add soft materials before you do anything else. You don’t need studio acoustic treatment here, you can also just use pillows, blankets, curtains drawn closed or even a mattress leaned against a wall. These are all great objects that dampen the sound due to their mass. Always treat the room first.
The container: you need to record more than just the instruments
There’s an important difference between a YouTube video with someone playing singing bowls and an actual sound bath session. While a video may be relaxing and beautiful, most people treat it as background music and not like a real session.
Think about what happens when you welcome your group in person. You greet them, introduce the session and speak about what you’re holding space for. Maybe you say a few words that help them settle in and let the day fall away. At the end, you bring them back and consciously close the space. They know exactly when to return to their body and to the room.
That arc from arrival to return is a full sound bath session. While the instruments are an important part of it, they are not everything.
When you consciously set the container, introduce yourself, name the intention, speak briefly before you begin playing and close the space when you finish – this is what allows someone to lie down with headphones on and feel genuinely held and not just sonically stimulated.
By the way, your voice is technically different from your instruments and may require extra equipment to be picked up properly – which brings us to the equipment.
If you have no budget right now: start with your phone
Most people wait until they have the perfect equipment until they feel ready enough to host their first sound bath session. But the perfect setup will never arrive and you already have everything that you need to record your first session today – with no additional equipment.
Here’s what to do:
Use your phone. Don’t just record audio with the voice memo app, but use the camera app and place your phone in front of your instruments.
The voice memo app usually records a signal in mono. Mono sound collapses the entire stereo field (which is important when listening with two ears) into a single point. It sounds flat, because there’s no width, no dimension and no sense of space.
The camera app of most modern smartphones, especially iPhones, records the audio signal of your videos in stereo. There are two microphones at different points on the phone to create a spatial image that makes a recording feel immersive.
Position the phone as if you’re filming yourself playing and press record. That’s it.
Of course, that won’t be your best-ever sound recording, but it will be real and something that people can actually listen to. If you charge a price for that recording, you can use what you earn and invest that into your next piece of equipment.
Equipment: everything that you need
If you’re ready to invest in a proper sound healing recording setup, the following pieces of gear are what matter most.
The microphone is the most important piece of equipment and has the biggest impact on the sound. Depending on your budget, you can get yourself a USB microphone or go for a professional condenser microphone. If you want to save some money and start with a USB microphone, you get everything you need to pick up sound, but that won’t be the best-sounding option. USB microphones have limited control, more background noise and you can’t properly expand your setup around them as your work grows. Very often, you need to replace them if you want to upgrade your setup later.
For most sound healing work, a small or large diaphragm condenser microphone gives you the warmest and fullest sound. However, that option requires an extra piece of equipment, an audio interface which allows you to connect the microphone with your computer.
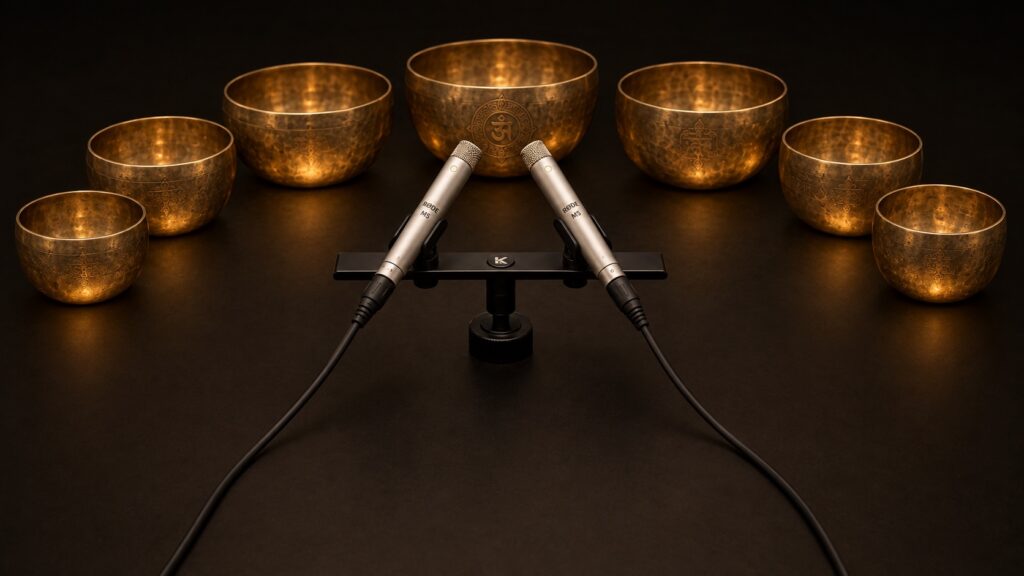
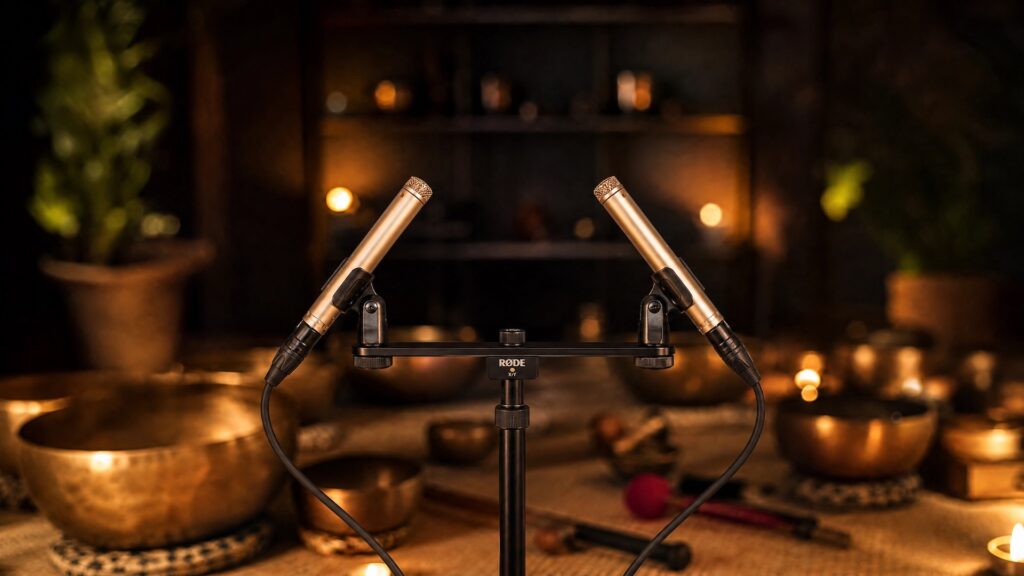
Always record your instruments in stereo. When you position two different microphones above your instruments, you create a sense of space that puts your listeners inside the room when listening with headphones. When using only one microphone or a microphone that only records signal in mono, then your whole set will be collapsed to a single point. That works well for voice only, but for sound baths mono is an absolute no-go. Your listeners will immediately notice that something is off even if they can’t explain why.
There are stereo USB microphones that allow you to record the signal with two capsules even though you only use one microphone. That works similarly to using two separate condenser microphones – however, the quality is way better when using two separate mics.
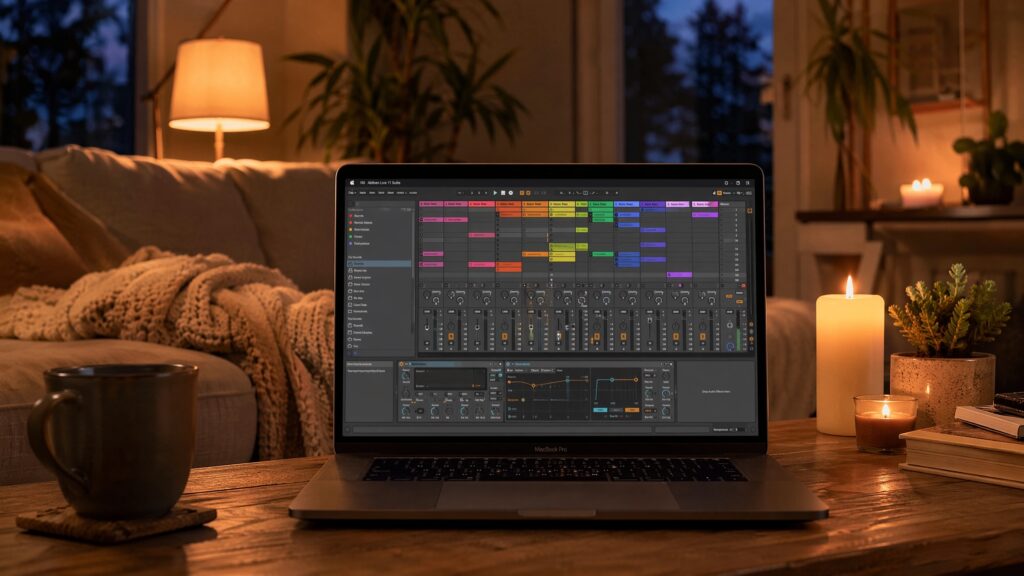
Then you need recording software. GarageBand on Mac is a free audio software and handles multi-microphone recording well. An alternative for Windows is Audacity. Another alternative for both operating systems is Ableton Live and comes with a free trial. The last option is excellent for more complex recording setups, but not necessary if you’re just starting out recording your instruments.
The signal chain: how to troubleshoot anything
Every recording setup follows the same simple path:
Instrument → Microphone → Interface or Mixer → Computer → Listener
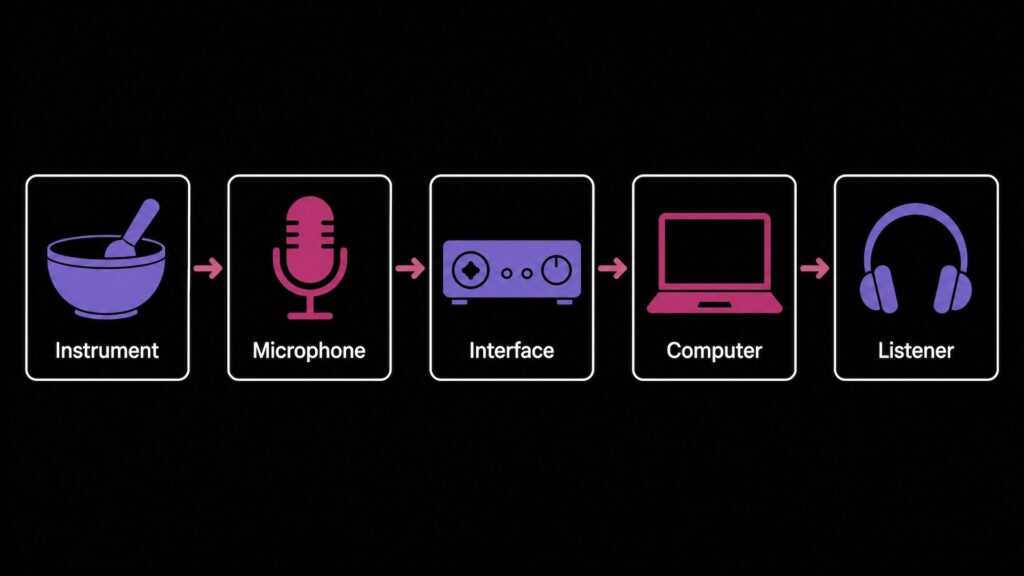
If something ever doesn’t sound right, check each step in order. The problem is always somewhere in the chain.
Here are a few things that I’ve seen most people doing wrong:
Large diaphragm condenser microphones need phantom power – 48V – to work. This is activated on your audio interface or mixer. Without it, you’ll get no signal or only a very faint one. Dynamic microphones (that’s the alternative to condenser microphones) don’t need 48V.
Once signal is arriving at your interface, check that your recording software has selected the correct input and audio device. Usually, the software picks the laptop microphone first instead of the external microphones.
Check your levels before every session. Play the loudest part that you’re likely to play during the recording. If the meter in your software ever hits red – you’re distorting. Bring the gain down to the green and sometimes orange area. Sound healing needs space, so you can also record with a bit more distance until you hit distortion.
The checklist before you record your sound bath:
- Choose your room – soft, quiet, away from street noise
- Close all windows and doors
- Wear clothes that don’t rustle
- Connect up equipment, activate phantom power if using large diaphragm condensers
- Open your recording software, confirm the correct input is selected
- Play through everything – check signal arrives at every step in the chain
- Do a 2–3 minute test recording
- Listen back on headphones – is there background noise? Distortion? Clothing sound?
- Restart your computer and confirm the setup still works
- Press record – and keep the setup as it is. Never adjust levels mid-session
The software for live online sessions: Zoom
If you’re running live sound healing sessions on Zoom rather than pre-recorded sessions, there’s one thing you need to understand about how Zoom works by default.
Zoom is designed for speech calls. It compresses audio to keep the connection stable, automatically reduces background noise, and applies processing that makes voices sound clear on any internet connection. All of that is actively destructive for sound healing, which needs the full frequency range intact.
Here’s the fix:
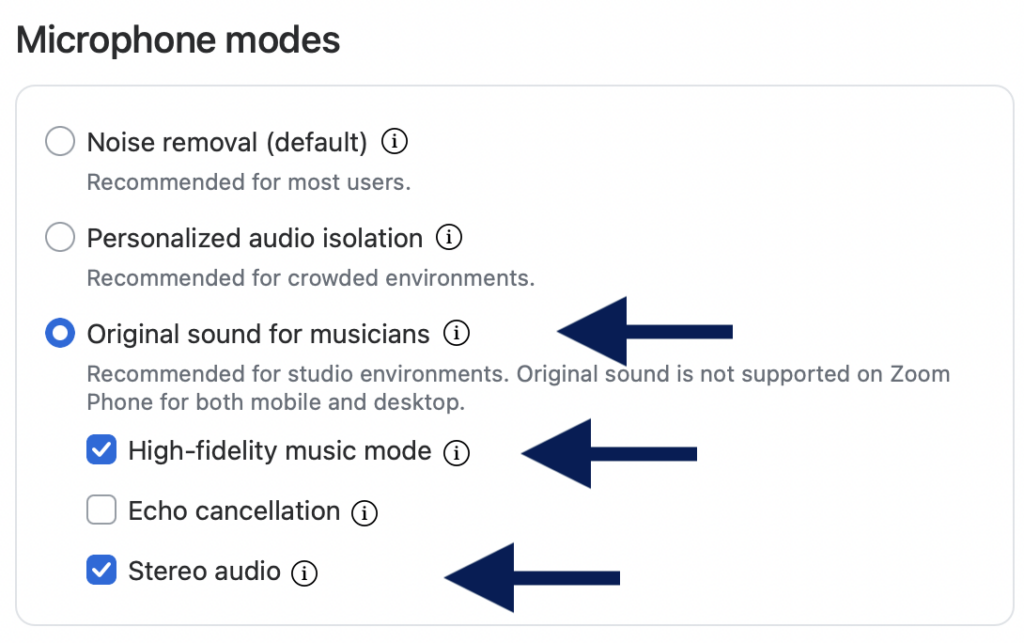
In Zoom’s audio settings, enable Original Sound (also called Music Mode in some versions). This tells Zoom not to process the audio. Then set the audio quality to the highest available option, and disable automatic noise suppression.
That’s the quick fix – if you want the full picture on why Zoom does this and when it’s worth skipping Zoom entirely, I break it down in more detail here.
Also: test your connection before every live session. Use a stable Wi-Fi connection or connect your computer directly to the router via an ethernet cable (Ethernet is my favourite as it guarantees full stability). Never use mobile data.
Confirm inside Zoom that the correct microphone is selected – not your laptop’s built-in mic – and then call a friend on the Zoom link ten minutes before going live. Record the meeting and listen to how you sound on their end.
Remember, your listeners are about to close their eyes and trust you to hold them for the next hour. Therefore, your setup should be invisible. It should just work.
One more thing
I have heard many sound healers say their magic doesn’t translate through a recording and that they need the physical presence with everyone in the room at the same time.
I understand why they say that and I felt that uncertainty myself before I went live for the first time. But what I have experienced – both as a facilitator and as a listener – is that when the setup is done with care and intention, you can bring exactly the same presence you would bring to a live session and your healing arrives. Not as a lesser copy of your real session, but as something that has its own place and something that people can integrate into their lives easier than a physical session ever could.
Your listener is lying in their bed with headphones on. Everything around them has gone quiet and they can just let the sound move through them.
Maybe you recorded this three weeks ago in your bedroom – none of that matters to your listener – because the field you were in when you played is still there, and they can walk into it whenever they need it.
That’s sooo worth recording.
Need help with your setup?
If you want to start recording sound baths, but you’re not sure which setup actually makes sense for your specific instruments and situation, that’s exactly what I help people figure out. Book a call with me and we’ll sort out your setup together.
FAQ
Yes. Open the camera app – not the Voice Memo app. Voice Memo usually records in mono, which sounds flat and narrow because it collapses the entire stereo field into a single point. Your camera app records in stereo, capturing the spatial quality that makes sound healing feel immersive. It won’t be your best-ever recording – but it’s a real starting point, and a real starting point is worth more than waiting for the perfect setup.
For most sound healing work, a large diaphragm condenser microphone gives the warmest, fullest sound – it captures both voice and instruments well. If you’re recording instruments only, a matched pair of small diaphragm condensers positioned as a stereo pair is excellent. Avoid USB microphones – they have a noisy floor and limited control. And always record in stereo. Two microphones, positioned correctly, are what create the sense of space that puts your listener inside the room.
In most cases, yes. The energy field and intention held by the practitioner at the moment of recording remains accessible to listeners whenever they press play – non-locality means the healing is not bound to the physical moment it was created. The one exception: physical vibration like tuning forks pressed directly to the body cannot travel through headphones. But energy-based healing, frequencies, and intention travel just fine. Many people find recorded sessions more intimate than live ones precisely because they receive it from their own space, in their own time.
Usually it’s the room, not the recording. Check by listening back through good headphones instead of laptop speakers first – if it sounds full there, your speakers were the problem, not the recording. If it’s still flat, the room is likely too reflective or noisy, or the microphones aren’t positioned correctly in stereo.
Mono collapses everything into a single point, which is why phone voice memos sound flat and narrow. Stereo uses two microphones positioned correctly to recreate a sense of space, so the listener feels like they’re actually in the room with you.